
Case Manager Role
Screen Configuration
Navigate to Admissions on the left hand menu
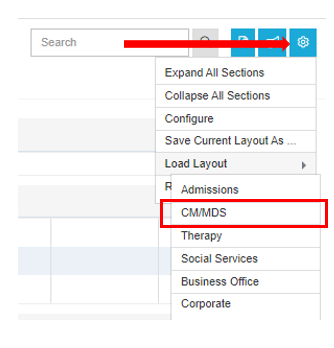
Select the Gear icon
Select Load Layout
Select your role
Tiles will be populated on the screen based on your role selection
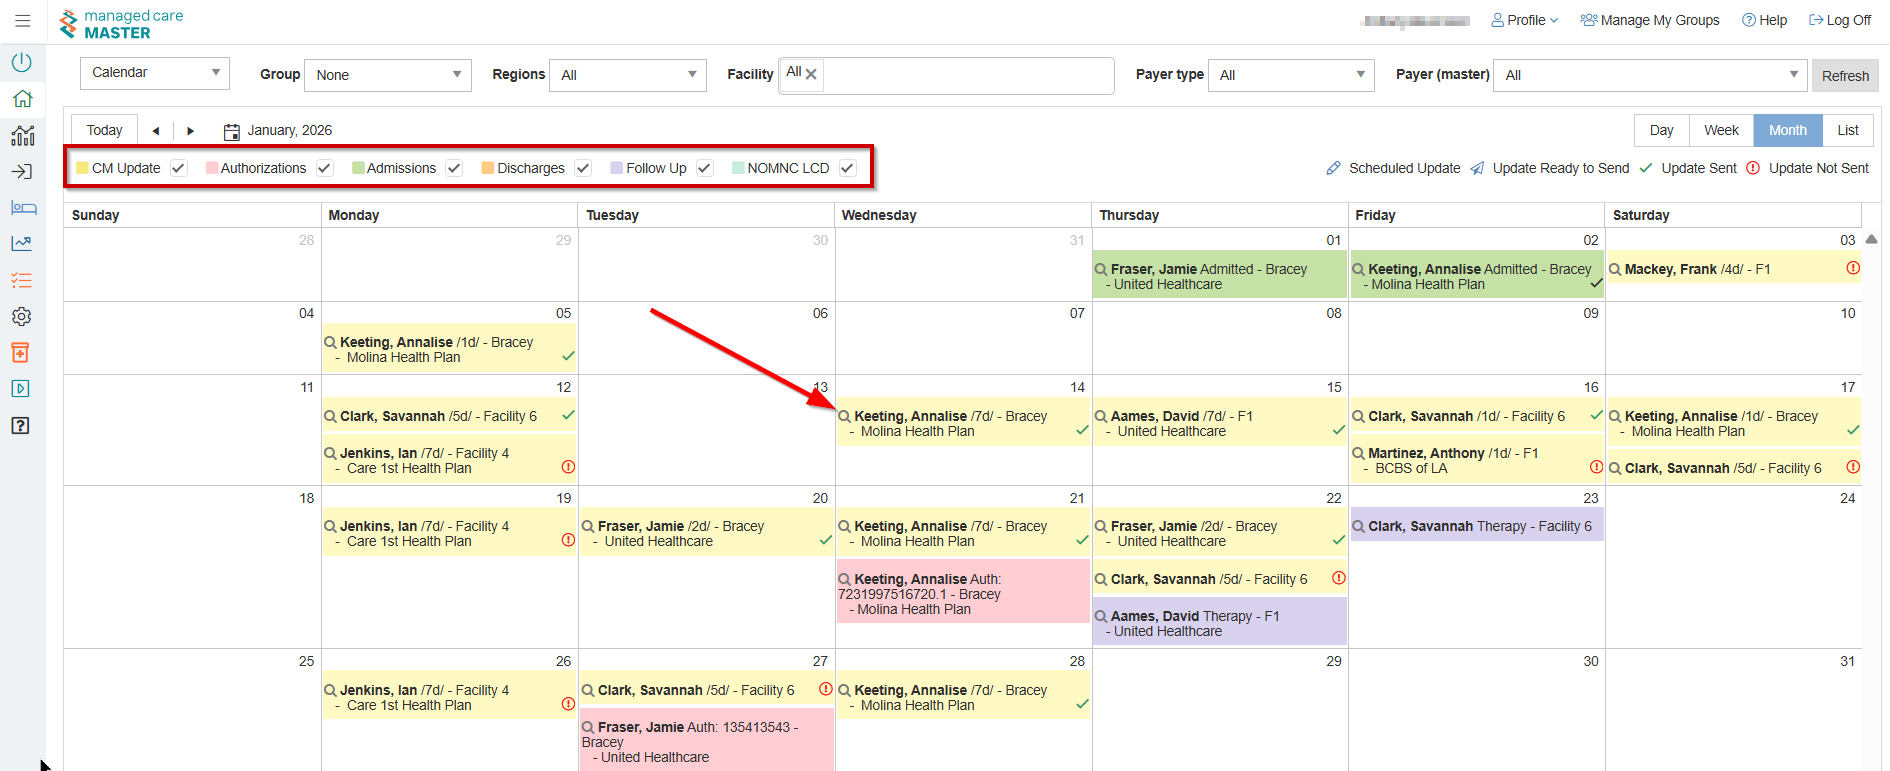
Reviewing patients with action needed
The Calendar on the home page will display updates due and expiring authorizations (select the magnifying glass to navigate directly to the patient in the Admissions area)
Updating Stay Info
Navigate to the Stay Info tile on the Admissions screen
Select Edit by clicking on the ellipse.
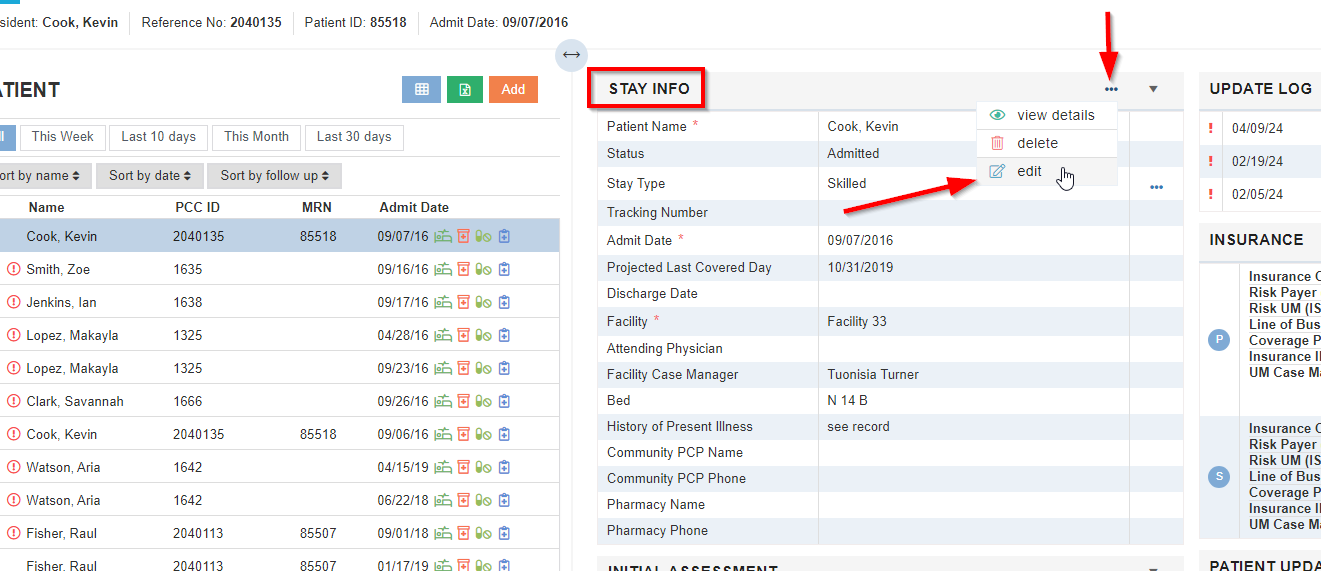
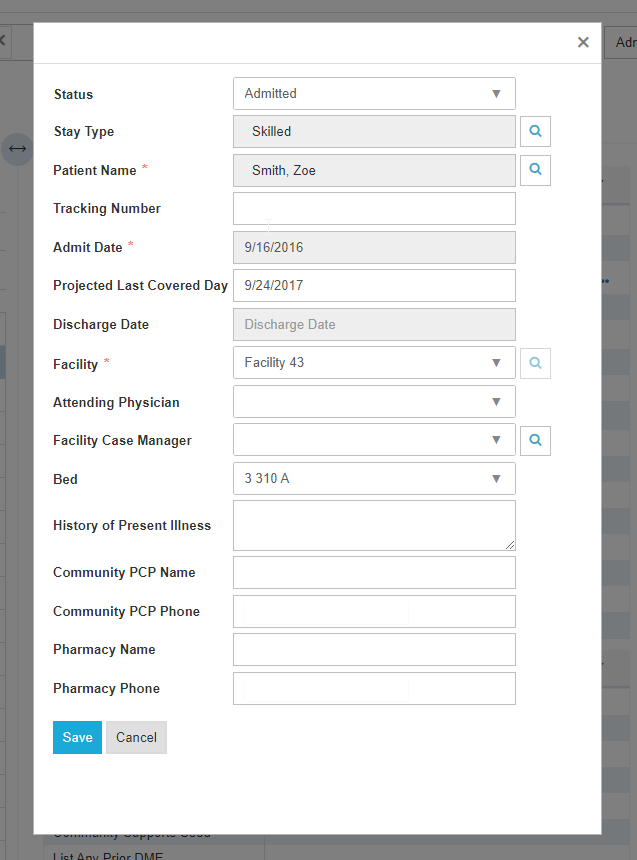
The fields below are able to be edited. The fields with a red asterisk are required.
Select Save once you have made edits.
Confirm Initial Authorization
Navigate to the Authorizations tile on the Admissions screen
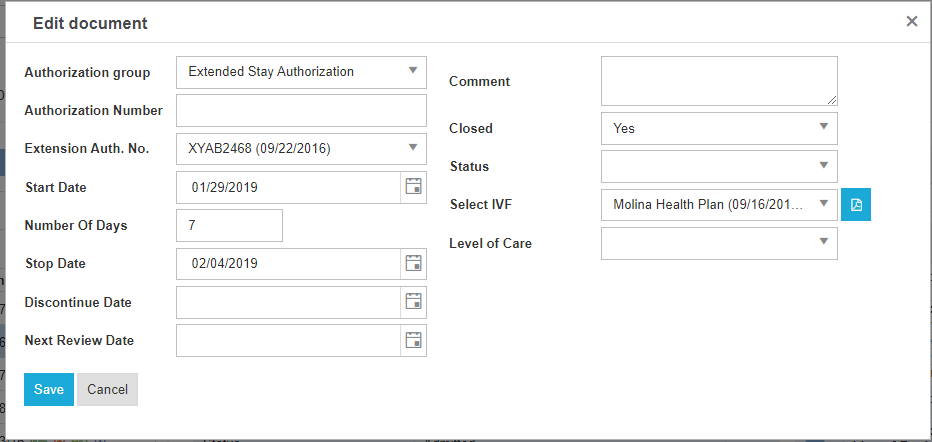
Select the ellipse to Edit
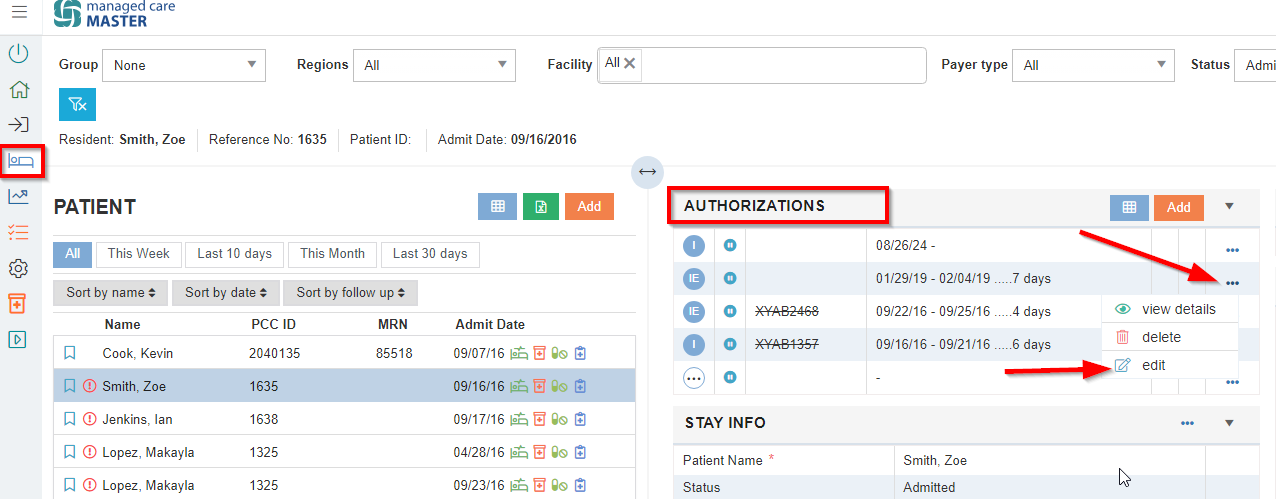
Select IVF (insurance verification form)
Select the Level of Care or enter HIPPS code
💡 Note: LOC must be entered in order for certain alerts to fire.
Confirm Contract Details
Select New Reports/Contract Summary
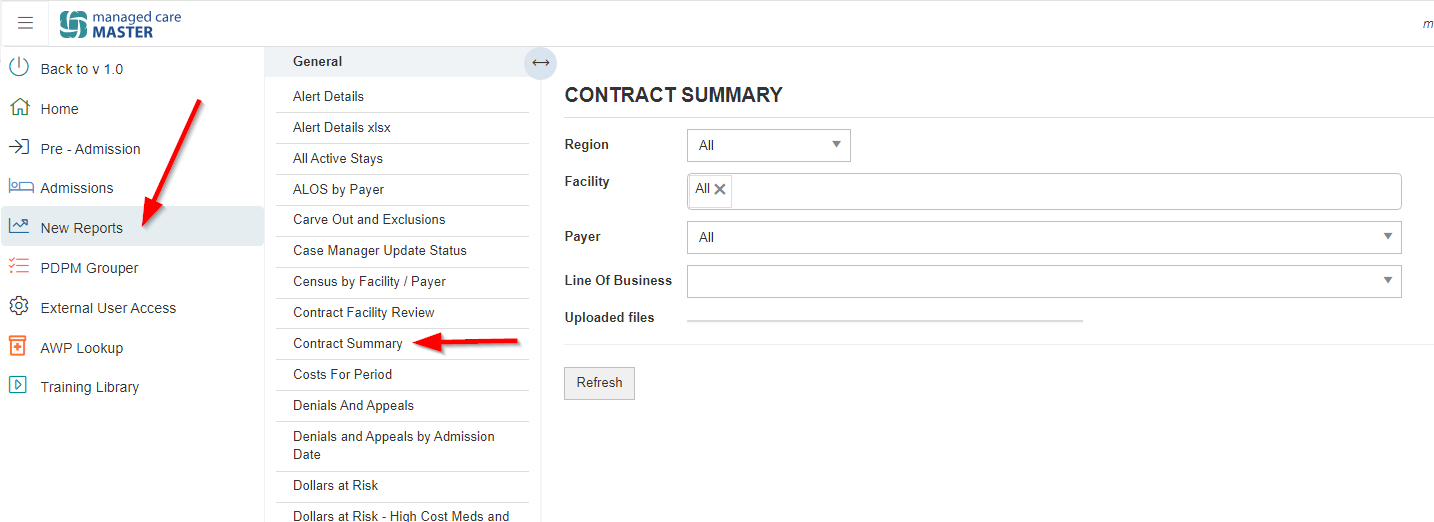
Use the field selections to filter
Select Refresh
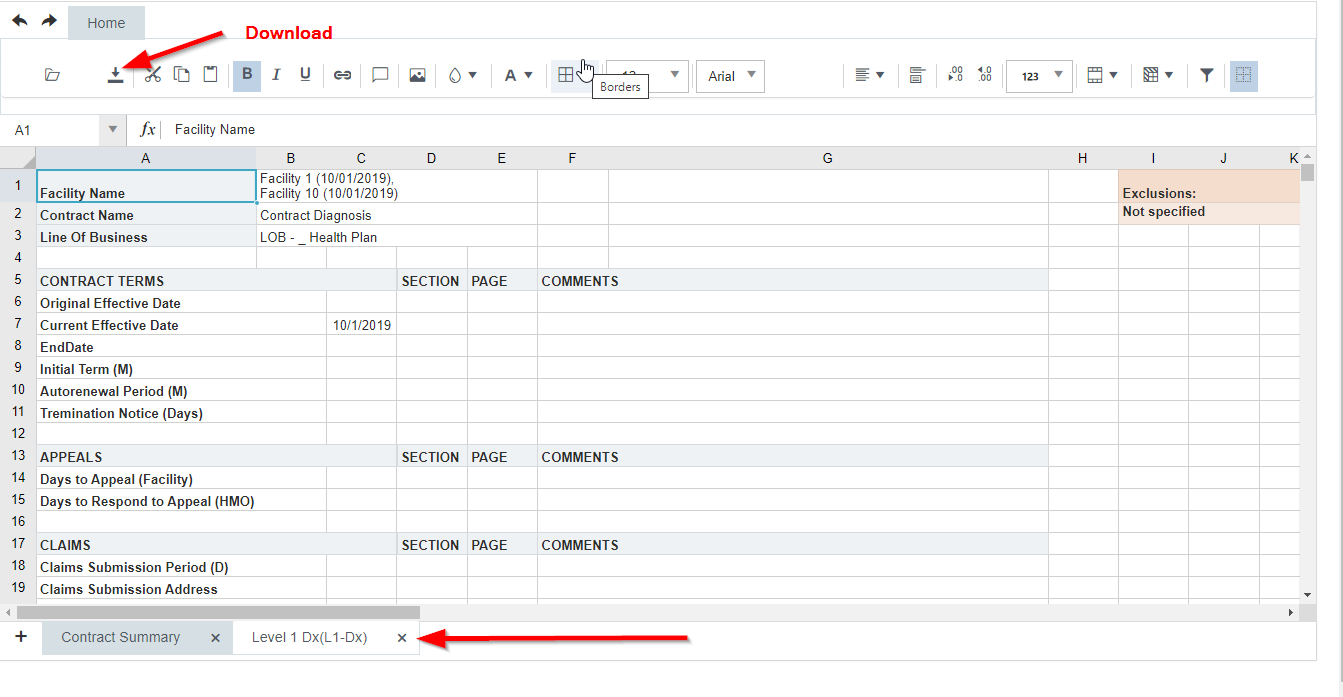
Find your summary in the sheet below
Navigate through the tabs as appropriate
This sheet is also able to be downloaded into Excel
Scheduling Concurrent Review
Option 1: Scheduling by frequency on the Case Manager Update Schedule tile
You may View Details if necessary
Select Add
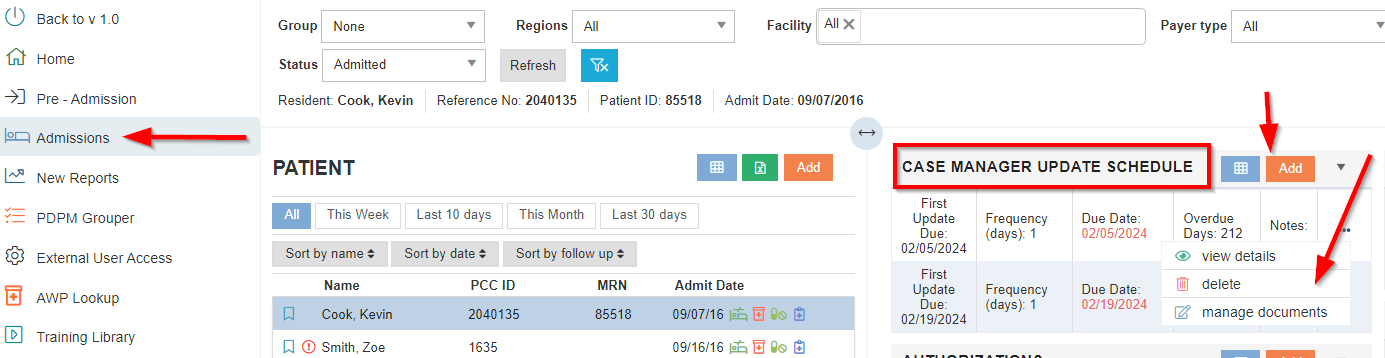
Select the Frequency - number of days between concurrent reviews
Select the Occurrences - number of times the concurrent review appears on the calendar
💡 The example below displays a concurrent review scheduled every 7 days for 4 weeks

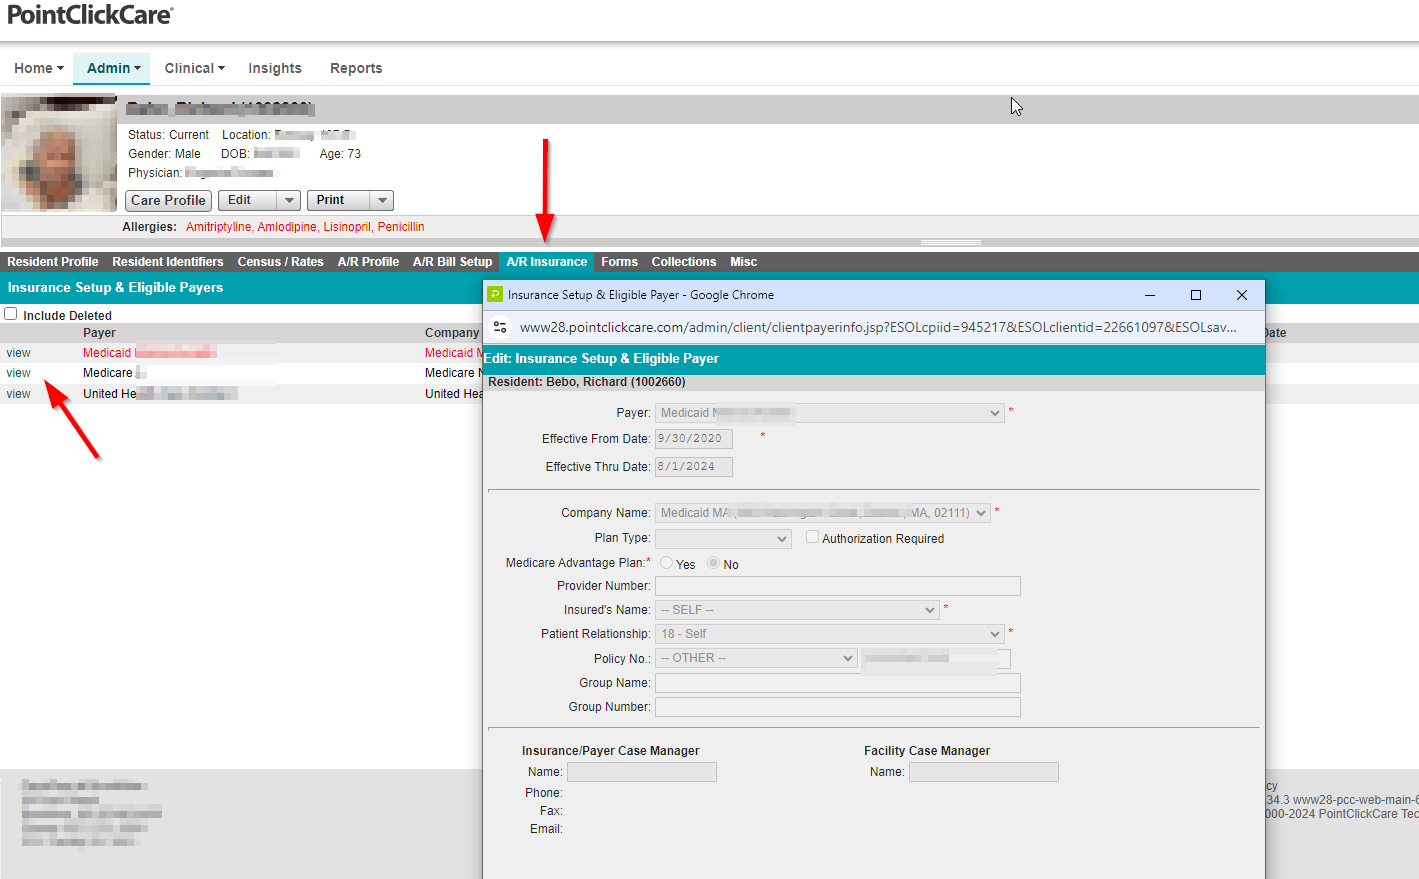
Option 2: Case Manager Update from NRD (Next Review Date)
PCC (PointClickCare) Users
Select Admissions
Select the patient
Navigate to the A/R Insurance tab
Enter the next review date in the appropriate authorization
MCM will pull over this information and automatically schedule an update on the calendar
Option 3: Updating Log (must already have an update scheduled by the other 2 options)
Scheduling one date at a time
Select Admissions in MCM
Select the patient
Select the Update Log
Select the Add button
Case Manager Update Schedule - select the original concurrent review date
Enter the new date and Save

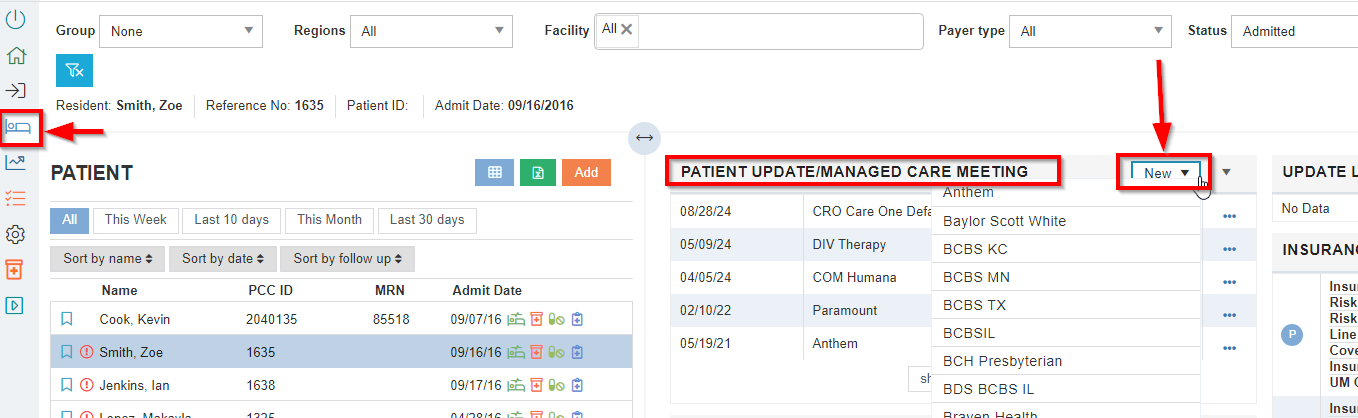
Complete Case Manager Updates and Send to the Payer
Select Admissions
Select the patient
Navigate to the Patient Update/Managed Care Meeting tile
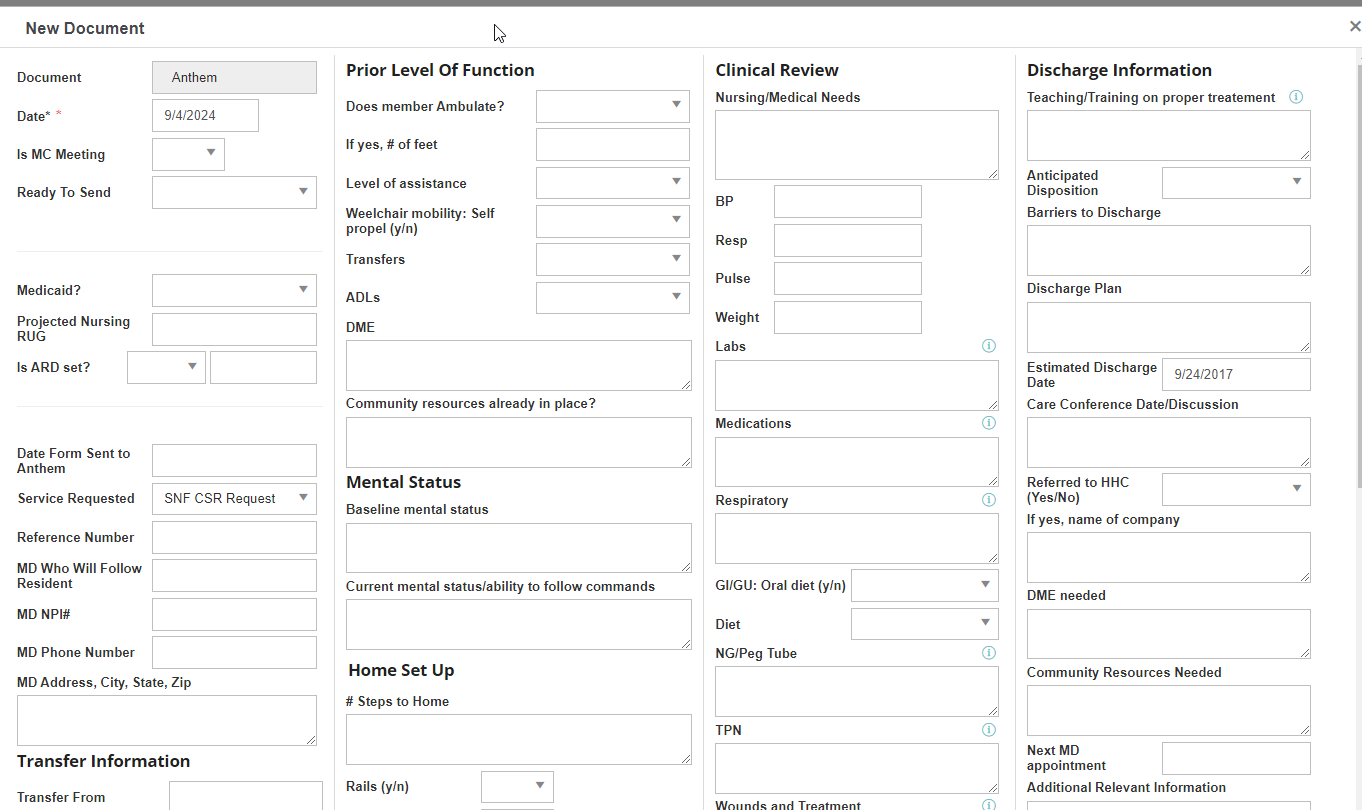
Select New and make your selection
Complete the information and Save
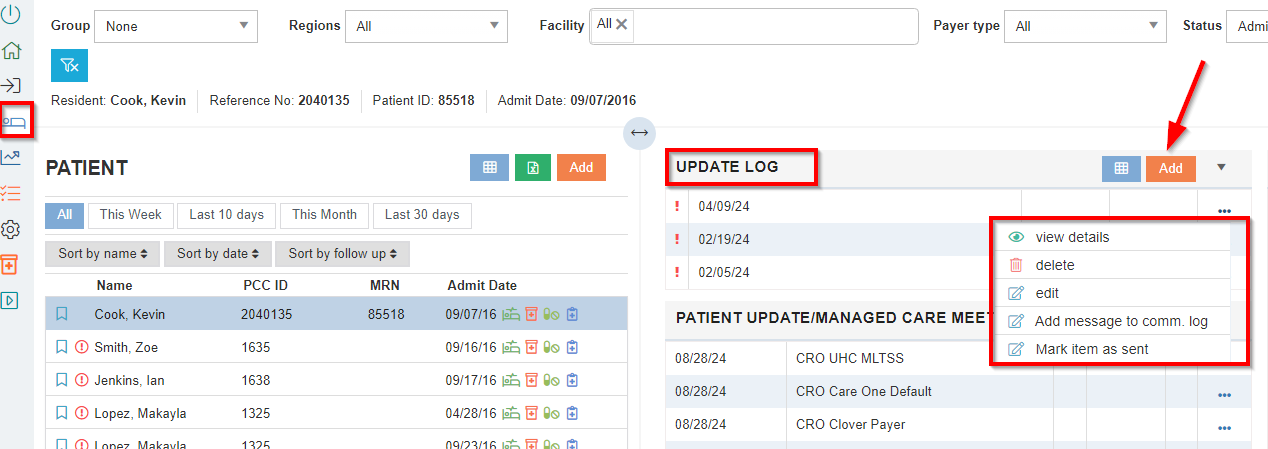
Complete Update Log
Select Admissions
Select the patient
Navigate to the Update Log
Select the ellipses
Add message and/or Mark item as sent
This action will auto-update the Calendar screen
Status will change from blue (scheduled) or red (past due/not sent) to green (done/sent).
Add Extended or Special Authorizations
Upon approval from payer, add Extended or special Authorizations (i.e. carve-outs, DME, transportation, etc.) and update changes in Level of Care/HIPPS if applicable
Select Admissions
Select the patient
Navigate to the Authorizations tile
Select the ellipsis to to revise current authorization
Select Edit to change the Level/HIPPS
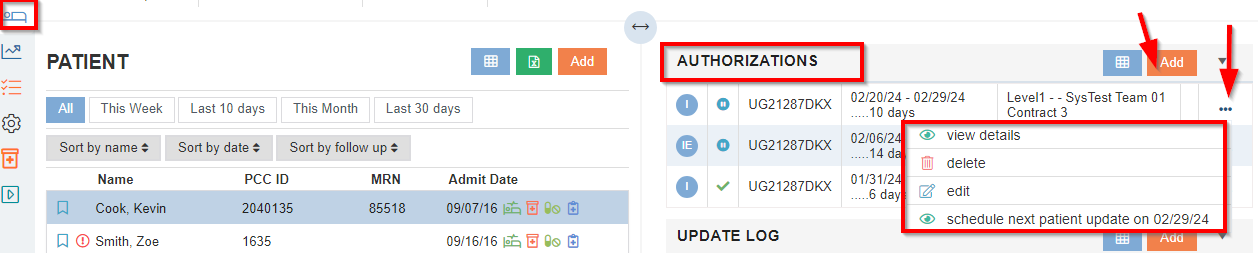
As a reminder, in Authorizations, the Stop Date box helps populate the data shown on the Expiring Authorizations calendar/list. If this is blank, nothing will show. After entering the Start Date, you can enter the Number of Days and it will auto-populate the Stop Date. You may also enter the Stop Date and the Number of Days will auto-populate.
Note: you may configure your Admission screen by dragging/dropping the tiles